Tuesday, February 23, 2016

Super simple dollar tree Easter jars

What you need:

>> mason jars 
>>ceramic Easter decor 
>>spray paint
>>hot glue gun + glue sticks 
>> candle stand 

Spray paint the candle holder, the ceramic figure & the mason jar lids. Let dry.

Attach figure to the lid with your hot glue gun & attach the jar to the candle stick with your hot glue gun. Let dry about -5 minutes. 

And that's all! 


Sunday, February 21, 2016

Mid century entertainment center refurbished

This piece I snagged at the Salvation Army for only $14. The top and sides were broken so it required some wood filling that seemed easier said than done. 


What I used:
>> Rustoleum flat white paint x3
>> Krylon metallic gold spray paint 
>> sand paper
>> Elmers wood filler 
>> a trial for scraping 
>> wooden nobs and hardware 
>> power drill
>> soap & water 
>> gloves


Here you can see the damage was pretty bad to the piece. 
I started out by giving it s good cleaning with soap & water then letting it air dry. 
Next came sanding. Lots of sanding. 
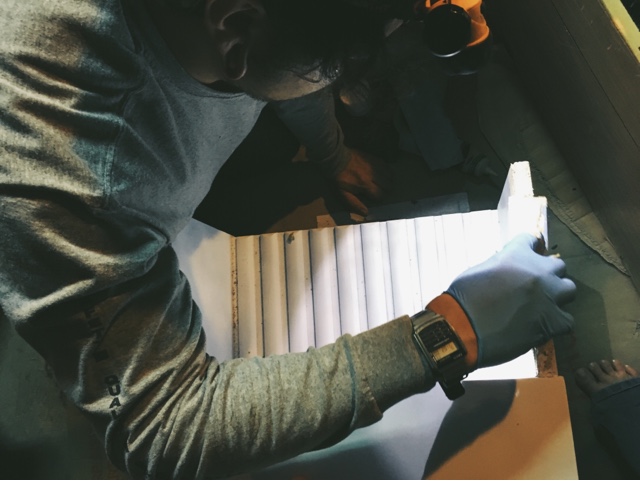
After I got a smooth base I started with my wood filler. This part is a process and takes lots of patience. Every layer requires 4-6 hours to harden & dry. We had to imitate the wood by recreating the broken areas. Some parts were pretty bad and required a couple of thick layers.

So two days were spent filling & drying. 
After the wood filler hardens you need to sand it down smooth. This will take the most time. If you want it to look like a solid piece then be very patient and careful. 


Next came another cleaning before starting on the paint job. Again, soap & water then let air dry. 
Layer by layer I added the paint until I got it to the right white that I wanted. About five or so layers.  The legs I spray painted metallic gold and the nobs were an add on we did. They were only $0.97 at Home Depot and require a power drill to be drilled in. 


After all the paint has dried I had my boyfriend added the nobs to the piece. 

As you can see from the photo, you can't even tell the wood was ever broken or cracked. It's now a solid piece.
 This is our finished product. I love it so much. It's one of a kind and custom to our liking. She's now in our living room enjoying her new home.


Enjoy! 

Thursday, February 18, 2016

Keep the glitter away from me

Today I decided to recreate a few Pinterest flower pots. I have some pretty cute ones I made out on our patio, but I wanted something more kawaii(ish) to still incorporate my personality. I pinned these a while back & finally decided to try them out.  


Everything besides the acrylic paint I found at the dollar tree. I picked up a pack of two pots, a small bottle of mod podge & glitter all for $1 each.

The paint I already had at home. I used regular $.97 acrylic that you can find pretty much anywhere.

 
Normally I'd stray paint the base, but I wasn't in the mood to gear up. So I painted by hand a few layers then after it dried, I added the design. For the glitter: you apply a thick coat of mod podge with a paint brush and sprinkle on the glitter. I used a bowl to apply it so any glitter that fell went into the bowl and i could just pour it back into the container. Tap it to let off any excess glitter and let it dry for about 3-5 hours. 


I did the same process with a few candle sticks as well. Same process besides painting, no painting!! Only use the mod podge to apply the glitter. 


Enjoy! 

Wednesday, February 17, 2016

Our space.

Today I decided to give our bedroom a much needed makeover. Originally we had red Victorian print bedding with black curtains. My anime posters & prints on the walls & so on. After surfing Pinterest for a few weeks I finally figured out the direction I wanted. Obviously I'm not a professional whatsoever, but I'm happy with the outcome. 


My little deer head paper mache project. Hobby had a sale today on half off of paper products. (Including paper mache) So I snagged this little cutie up for only $12.50 The frame was $7.00 but they had a 40% off coupon online, so it came out to only $3.50 (btw the glass heads that look identical to this sell for $69 so I'm totally okay with only spending $16 on my little project.) metallic paints were also on sale today for $1.50 marked down from $2.50


This was the finished outcome. 

The chevron curtains were  $15 for two panels at Walmart. Not too bad since normally one panel cost about that. I've been looking for a chevron print curtain for a while now. These were on an endcap I happened to glance at while looking for a mirror. Which btw that mirror was on sale for only $29! It's heavy as hell too. Very good quality for such a low price. 
White bedding is my absolute favorite. It just feels so fresh & clean. This one was only $30 but it didn't include the sheets or pillow cases, only the shams. So up picked out a grey to go underneath. 

These accent pieces were all (besides the lamp) in the 80% off section at Hobby Lobby. Nothing was over $5 the geometric ones I got last year for $2 in the clearance section, today I went in and they brought them back regular priced for $16.99 whoa! I got a deal! 

Gold has been a favorite of mine. We got this accent pillow at Marshals for only $12
This side needs something extra I can't seem to figure out. Maybe a lamp? 

On our floor we have a faux fur rug. We use to have a real one but our idiot dog chewed it up. This one was only $14 at Marshals (compared to $70). 

Well that wraps it up! Time to nap with this lazy pup in our cozy new space.


Sunday, February 14, 2016

Mellow Yellow.


The other day I went thrifting on half off day at Goodwill. I found this old toddler picnic table for only $2!!!! I sanitized it, gave it some tlc & a fresh coat of plastic bonding paint, and bam! New picnic table for my kiddos. **I use Kyrlon for plastic when I repurpose anything plastic that the kids play on or with.**


Before: 


In between coats 

After: 


Monday, February 8, 2016

Chatbook


I read about chatbook from a fellow mommy blogger & had to see for myself what all her rants and raves were about. Chatbook allows you to create a 60 page book (soft or hardcover) with your Instagram photos. Printing them all out sometimes they get lost, or honestly, they never leave our Instagram feed. And photo albums are pretty much a thing of the past. With Chatbook you get to have a professionally printed book filled with your personal memories for only $8. They come in volumes so you can document however you please. I recently made my first purchase & now I'm hooked. You guys can use my code:NETY7ERX for your first Chatbook to be free. 


-XO

Thursday, February 4, 2016

Copycat Joes Crab Shack Crab Dip


      >>2 1/2 ounces cream cheese
      >>2 tablespoon mayonnaise
      >>1⁄2 cup sour cream
      >>2 tablespoon butter, softened
      >>1 tablespoons seasoning salt
      >>1 teaspoon paprika
      >>4 teaspoons onions, minced
      >>4 teaspoons green peppers, minced
      >>1⁄4 cup mozzarella cheese, shredded
      >>2 (6 ounce) can crabmeat


What to do:

  1.  1. Mix cheese, mayo, sour cream, and butter until smooth.
  2. 2. Blend in salt and paprika.
  3. 3. Stir in onion, green pepper, cheese, and crab meat.
  4. 4. Bake at 350F for 25 minutes, until bubbly.
Enjoy as an appetizer at your next crab boil! We sure did and it was perfect.

Angel food cake with pineapple whipped topping.


INGREDIENTS
  • >>1 cup cake flour (no other flour substitutions)
  • >>⅔ cups sugar
  • >>12 large egg whites only, must be at room temp (If any yolk accidentally falls in, remove it!)
  • >>1½ tsp cream of tartar
  • >>¼ tsp table salt
  • >>⅔ cups sugar
  • >>1½ tsp vanilla extract
  • >>½ tsp almond extract 
For Topping
>>1 oz box Instant Vanilla Pudding 
>>20 oz can Crushed Pineapple
>>8oz tub of  Cool Whip (thawed) 
>>Strawberries & Blueberries


What to do

  1. Important: Do NOT grease the pan!!
  2. Preheat oven to 375F. Sift cake flour and ⅔ cup sugar into a bowl and set aside.
  3. In a separate bowl, beat egg whites, cream of tartar, and salt until it forms soft peaks. Add the other ⅔ cup sugar slowly, and then beat on high until stiff peaks form.
  4. Beating on LOW, add in flour mixture and both extracts slowly, stopping as soon as batter is incorporated. Do not over-mix. Using rubber spatula, fold in the sides and bottoms of bowl, to fully incorporate.
  5. Spoon batter into un-greased cake pan. Gently shake to even out batter.
  6. Bake 30-35 min, or until the top springs back with a gentle touch, and top is golden.
  7. Invert pan upside down, to cool completely. Run a thin knife around pan sides, and remove bottom from the sides. Gently cut bottom away from pan.
  8. For topping: In a bowl mix can of crushed pineapple with dry pudding mix. Then stir in Cool Whip. 
  9. Begin to layer the cake, spread on whipped topping & add berries. Repeat. 


What's happening now.

Wow! It's been a good minute since I've used my my little writing outlet. How is everyone doing? Life is all kinds of insane, but ...